Giving your kitchen a refresh can be exciting, and painting the cabinets often seems like a good place to start. Especially if you’re trying to stay within a budget.
On the surface, it looks like a manageable DIY project. But in reality, cabinet painting is one of the trickiest tasks to get right, and it’s surprisingly easy to end up spending more time, money, and energy than expected.
Here’s what you need to know before deciding to take on cabinet painting yourself, and why hiring a professional may be the smarter route. Proper cleaning and prep take time and effort, and while it’s tempting to cut corners to save time, that’s where many cabinet painting mistakes begin.
Skipping key steps or rushing through the process often leads to peeling, uneven coverage, or finishes that don’t hold up.
Why DIY Cabinet Painting Often Doesn’t Go as Planned
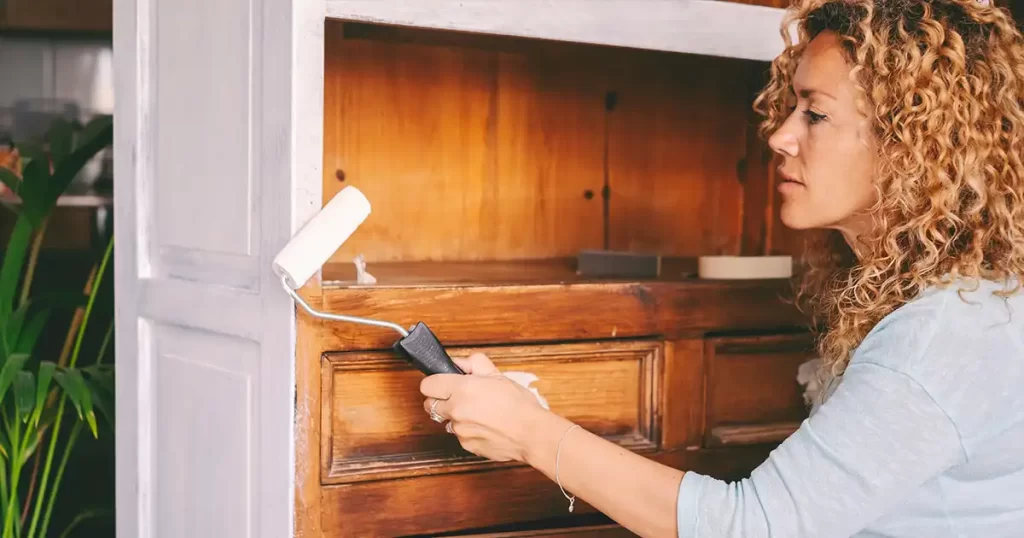
1. Prep Work Isn’t Optional and It Takes Time
To get a smooth, lasting finish, a lot of prep work goes into painting cabinets. You’ll need to:
- Remove all hardware and doors, including drawers and base cabinets, as well as cabinet fronts, to ensure every surface is accessible.
- Thoroughly clean and degrease the surfaces, using plenty of elbow grease to remove stubborn grease, especially around the stove and sink, and don’t forget to clean the surrounding area to prevent dust or debris from affecting your finish. Use a paper towel for wiping up any remaining residue.
- Sand everything to the proper texture, paying special attention to cabinet frames and cabinet boxes, and always sand in the direction of the wood grain for the smoothest results.
- Apply the correct primer, and fill any holes or dents with wood filler before priming. After sanding, use a tack cloth to remove all dust from the surfaces.
- Mask off the kitchen and protect floors and countertops by covering appliances and any areas not being painted with plastic sheeting or painter’s tape to keep them fully covered during the painting process.
A thorough painting process involves careful covering of all surfaces and appliances to avoid accidental splatters and ensure a professional result.
These steps are time-consuming and can’t be rushed.
Skipping or half-doing even one can lead to paint that chips, peels, or scratches easily. This is one of the biggest reasons DIY cabinet paint jobs tend to fail over time.
2. Most Store-Bought Paints Aren’t Made for Cabinets
Standard wall paint isn’t designed for the constant wear and tear that cabinets go through. Think about how often you open and close them, how much heat, steam, and grease they’re exposed to, and how often they get cleaned.
Professional painters use cabinet-grade products that bond well, cure properly, and hold up to everyday use. Many professionals prefer oil-based paint or oil paint for its durable finish and self-leveling properties, which help achieve a smooth, professional look.
These aren’t always easy to find on store shelves, and they usually require specific application methods to work as intended. Using a paint sprayer or spray paint can help achieve a flawless finish coat, and with high-quality products, you may need only one coat or two coats for full coverage.
Always allow the paint to cure properly between coats, and remember that some finishes can take weeks to fully cure. Applying a second coat of paint is often necessary for even coverage, but with certain oil-based paints, you may get away with fewer coats.
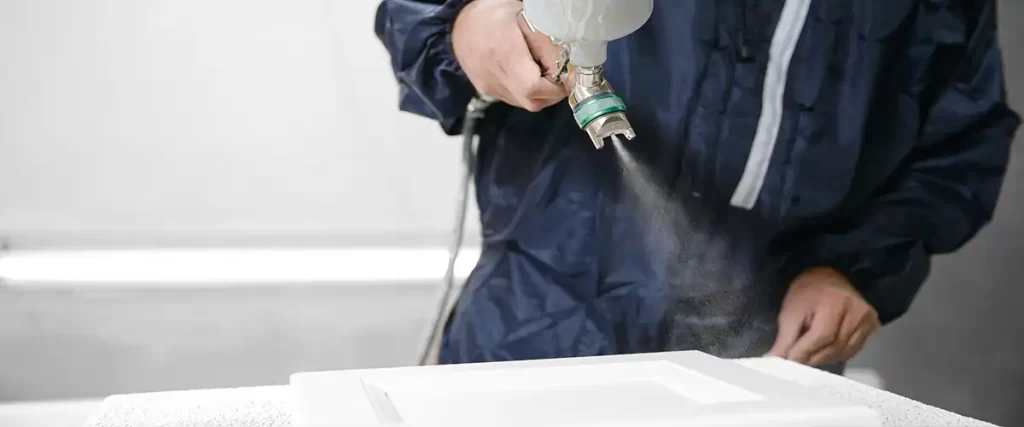
3. Getting a Smooth Finish Is Hard Without the Right Equipment
Brushes and rollers might work for small furniture pieces, but kitchen cabinets are a different story. Brush strokes and roller marks tend to show, especially on flat cabinet doors and drawer fronts. Uneven coverage, visible texture, or patchy paint can make the whole kitchen feel unfinished.
Professionals use HVLP (high-volume, low-pressure) sprayers in controlled environments to get a flawless, factory-smooth finish. A paint sprayer can deliver a sprayed finish that minimizes brush strokes and creates a truly professional appearance.
4. DIY Cabinets Are More Prone to Chipping and Peeling
Even when prep is done correctly, DIY-painted cabinets are still more likely to wear down quickly. High-traffic areas, like around handles and under the sink, are especially vulnerable.
Professionals not only use stronger products but also know how to apply them properly, giving the paint time to cure and harden fully. They also ensure each finish coat is applied correctly and allow for the necessary cure time so the cabinets can fully cure, resulting in a more durable finish that stands up to daily use.
That makes a big difference in how well the finish holds up over the years. If chips or scratches do occur, professional painters can perform seamless touch-ups that blend perfectly with the original finish.
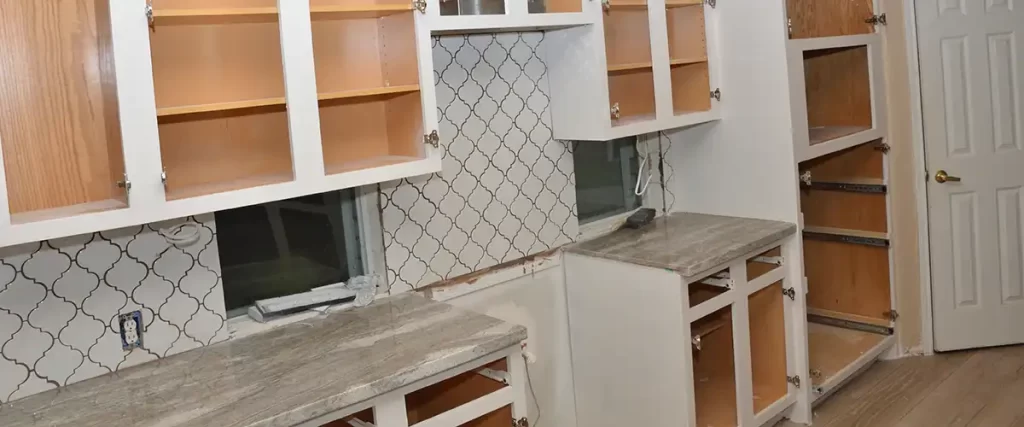
5. It’s Messy, Disruptive, and Hard to Contain
Painting cabinets isn’t a tidy task. There’s dust from sanding, fumes from primers and paints, and the challenge of turning your kitchen into a temporary workspace for days, or even weeks, depending on the size of the project.
It’s important to cover appliances and the surrounding area with plastic sheeting or drop cloths to keep everything protected and covered during the process. Proper covering helps prevent dust and paint from settling on surfaces you don’t want to clean later.
Professional crews use dust control systems, ventilate properly, and work in a way that keeps the mess contained. That means less disruption in your home and fewer lingering odors or cleanup headaches.
6. Fixing Mistakes Can Get Expensive
It’s not uncommon for DIY cabinet painters to realize halfway through that something’s gone wrong. Maybe the paint isn’t sticking, the color looks off, or the finish is uneven. Repainting usually means sanding everything down and starting over, which is both time-consuming and frustrating.
In some cases, cabinet painting mistakes, like using the wrong products or skipping surface prep, can cause damage severe enough that doors or hardware need to be replaced entirely.
This might mean replacing old hinges with new hinges or updating your cabinets with new hardware, which can add unexpected costs.
You may also find yourself making extra trips to the hardware store for supplies or replacement parts. A professional job helps avoid these costly do-overs from the beginning.
7. Professional Work Comes With a Guarantee
Most reputable cabinet painters stand by their work with warranties. That means if something chips, peels, or fades prematurely, they’ll fix it. When you paint cabinets yourself, any problems that come up later are yours to deal with.
Knowing the job is done right, and backed by a service guarantee, brings a level of reassurance that DIY projects just can’t offer.
Are You Ready? Assessing Your DIY Skills
Before you start painting kitchen cabinets, take a moment to honestly assess your DIY skills. Painting cabinets isn’t quite like rolling a fresh coat on a bedroom wall. It requires patience, a steady hand, and a good eye for detail.
If you’ve never tackled a project involving cabinet doors or woodwork before, consider starting small.
Try painting a single cabinet door or a piece of furniture to get a feel for the process and see how comfortable you are with the tools and techniques involved.
Think about your experience with painting, sanding, and handling hardware. Each step matters more than it might seem.
Cabinet painting is a multi-step project that often stretches over several days, and rushing through it is one of the most common cabinet painting mistakes. Make sure you’re prepared for the time commitment and attention to detail it requires.
If you’re someone who enjoys DIY challenges and has a few successful paint projects under your belt, you might be up for the task.
But you’re new to kitchen cabinet painting, it’s okay to take it slow or even call in a pro for the best results. Being realistic about your skills and expectations can make all the difference in how your kitchen cabinets turn out.
Safety Precautions Every DIYer Should Know
Safety should always come first when painting kitchen cabinets. Cabinet painting involves working with paints, primers, and sometimes strong cleaning solutions, so it’s important to protect yourself and your space.
Always wear gloves to shield your skin from chemicals, safety glasses to protect your eyes from splashes or dust, and a mask to avoid inhaling fumes or sanding particles.
Make sure your kitchen is well-ventilated. Open windows, use fans, and keep the air moving to help clear out any lingering paint smells.
Keep your workspace organized and free of tripping hazards, and never leave paint cans or tools where they could spill or cause accidents. It’s also smart to have a fire extinguisher nearby, just in case, and to avoid any open flames or smoking while you’re working.
Always read and follow the instructions on your paint and primer products, as each brand may have specific safety recommendations.
The Hidden Challenge: Maintenance and Upkeep
Once your kitchen cabinets are freshly painted, the work isn’t quite over; proper maintenance is needed to keep them looking their best. Newly painted cabinets need gentle care to keep your cabinets look fresh, especially during the first few weeks while the paint fully cures.
Avoid using harsh chemicals or abrasive scrubbers that can scratch or dull the finish. Instead, wipe down your cabinets with a soft cloth and mild soap, and always dry them thoroughly to prevent water spots or streaks.
Regularly check your painted cabinets for any chips, scratches, or signs of wear, and touch up any trouble spots promptly to prevent bigger issues down the road.
Taking a few minutes each week to clean and inspect your cabinets can help your painted finish last for years, keeping your kitchen looking fresh and inviting.
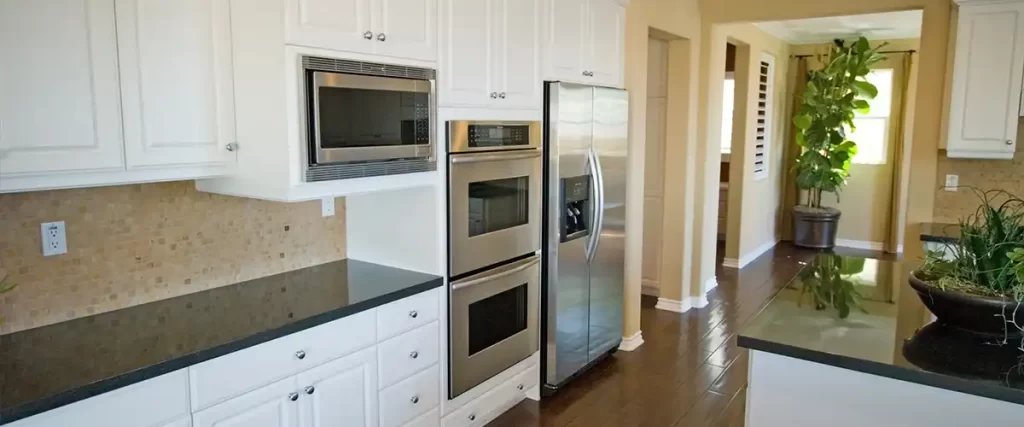
The Bottom Line: DIY Isn’t Always the Saver It Seems
Choosing to paint your kitchen cabinets can be a satisfying DIY project if you have the time, tools, space, and patience to do it properly.
But for most homeowners, hiring a pro is not only easier. It also delivers a much better, longer-lasting result.
While some people are tempted by the idea of a diy paint project, the reality is that professional techniques and products are often needed to truly transform your kitchen when you paint your cabinets.
A professional cabinet painter brings:
- Specialized tools and equipment
- High-quality materials made for kitchen use
- A proven process that prevents problems
- Clean, smooth, consistent finishes
- A warranty that protects your investment
Let Roll Call Painting Take It From Here
If you’re thinking about giving your kitchen a fresh look, our team at Roll Call Painting is here to help. We offer expert cabinet painting services throughout Wichita, KS, delivering clean, modern finishes that last.
We start with a free in-person estimate, work with a professional interior designer to help you choose the perfect colors, and back every job with a 3-year warranty.
Our process is designed to be efficient, professional, and completely tailored to your space.
Call us at (316)-800-6994 or request your estimate online. Let’s make your kitchen feel new again without the stress of trying to paint your kitchen on your own.
FAQs
Can I paint my kitchen cabinets myself?
Yes, but it’s one of the toughest DIY paint projects. Success depends on how well you prep, the products you choose, and your patience. For lasting results, many homeowners find hiring a pro is the smarter investment.
How difficult is painting kitchen cabinets?
It’s more involved than most people expect. Proper prep, multiple coats, and attention to detail are needed for a finish that lasts. You’ll also need to wait a few hours between coats for the paint to dry properly.
Can I paint over cabinets without sanding?
Only if you use a bonding primer made for slick surfaces, but even then, light sanding is still recommended for best results.
What happens if you skip sanding?
The paint won’t stick well, which leads to peeling and chipping. Always sand in the direction of the wood grain for the best results.
What’s the best way to paint cabinets: a brush, a roller, or a sprayer?
Both have their place, but for the best finish, most pros use sprayers. If you’re going DIY, use a brush for edges and a foam roller for flat areas. Sometimes, finding just what you need for your project, like the right brush or roller, can make all the difference.
Do I really need to prime?
Yes. Primer improves adhesion, helps paint last longer, and prevents stains or wood tannins from bleeding through. A paint stick is helpful for stirring primer and paint thoroughly before application.
What type of paint should I use?
Use a cabinet-grade enamel or acrylic latex paint. These are durable and easier to clean, which is ideal for kitchens. For daily cleaning, use a soft cloth and warm water to gently wipe down your cabinets.
Can I repaint already painted cabinets?
Yes, but you should clean and sand them first to make sure the new paint bonds well and looks even. If you notice any small chips or scratches after painting, quick touch-ups can help maintain a flawless finish.