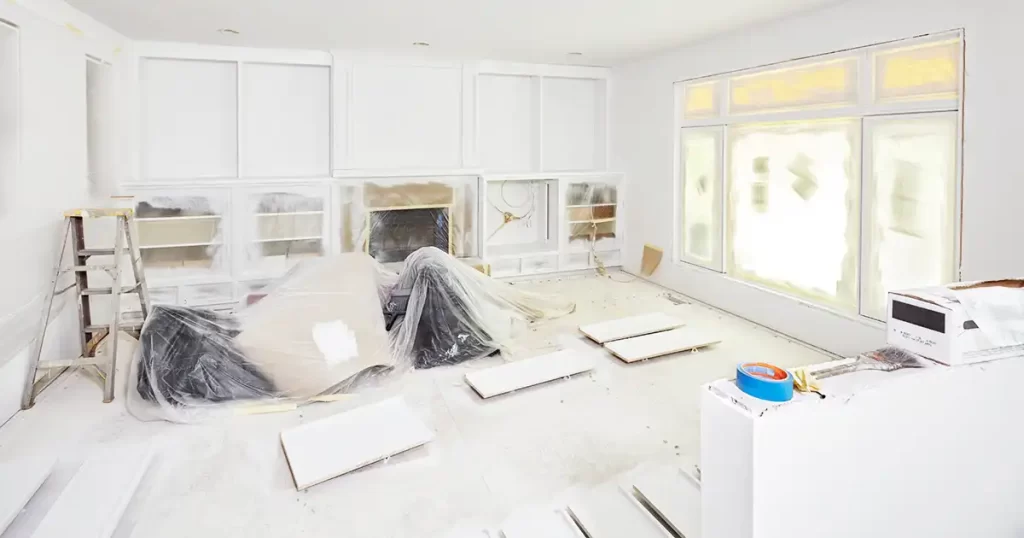
So, you’ve just had your kitchen cabinets painted, or maybe you tackled the project yourself. Either way, this fresh update can completely change the look and feel of your kitchen.
The way you care for your cabinets in the days and weeks after painting makes a big difference in how long the finish lasts. From how long to wait after painting cabinets to safe cleaning routines, this guide covers what to do (and what to avoid) to keep your cabinets looking their best.
How Long After Painting Cabinets Can I Use Them?
Knowing the right timeline is key to avoiding chips, smudges, and a weakened finish
Wait for the Paint to Cure, Not Just Dry
Paint feels dry to the touch within a few hours, but curing takes longer. Curing is when the paint hardens to its final, durable state. This is when it can handle daily use, cleaning, and moisture.
- Water-based paint: Cures in about 21–30 days
- Oil-based paint: Typically cures in 7–14 days
Even after applying the first coat, it’s important to allow proper curing time before adding additional coats or using the cabinets.
Until then, treat your cabinets with care. Avoid loading them with heavy items or slamming doors. If you’re wondering how long after painting cabinets can I hang them or use them normally, the safest answer is to wait until the cure is complete.
Do: Allow Ventilation to Speed Curing
Keep the space well-ventilated with fans or open windows. This speeds up the curing process by helping the solvents evaporate more efficiently.
However, be aware that extreme temperatures or high humidity can slow down curing and negatively affect the finish quality.
Don’t: Use Cabinets Like Normal Too Soon
Even if they feel dry, avoid placing items against the paint or using strong cleaners until the surface has had time to harden. You’ll avoid unnecessary dents, chips, or imprints on the finish.
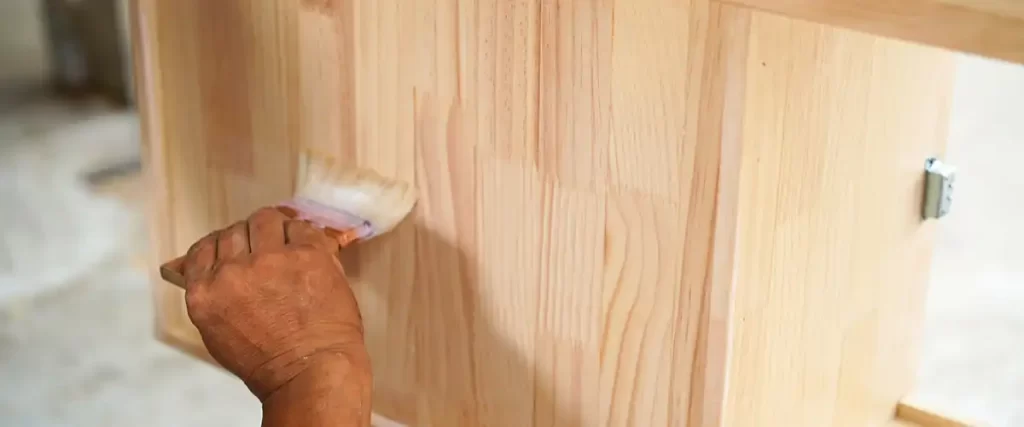
Considering Wood Grain for a Lasting Finish
When painting cabinets, paying attention to the wood grain is key to achieving a flawless, long-lasting finish.
The natural texture of wood grain can show through the paint if not properly addressed, leading to an uneven finish that detracts from your paint job.
To get the smooth finish you want, start by thoroughly sanding the cabinet doors and frames with fine grit sandpaper.
This step helps to level out the wood grain and creates a surface that allows the paint to adhere properly. Choosing a high quality paint designed for cabinets is also very important, as it provides a durable finish that can withstand everyday wear and tear.
Labeling and Organizing for Easy Reassembly
Before you start painting, take a few minutes to label and organize your cabinet doors and hardware. This simple step can save you a lot of time and frustration when it’s time to put everything back together.
Use painter’s tape and a marker to label each cabinet door and its corresponding hardware, noting their original locations.
Snapping a few photos of your cabinets before disassembly can also be a helpful reference during reassembly.
How to Clean Painted Cabinets (The Safe Way)
Once your cabinets are fully cured, routine cleaning helps preserve their look. But only if you use the right tools and products.
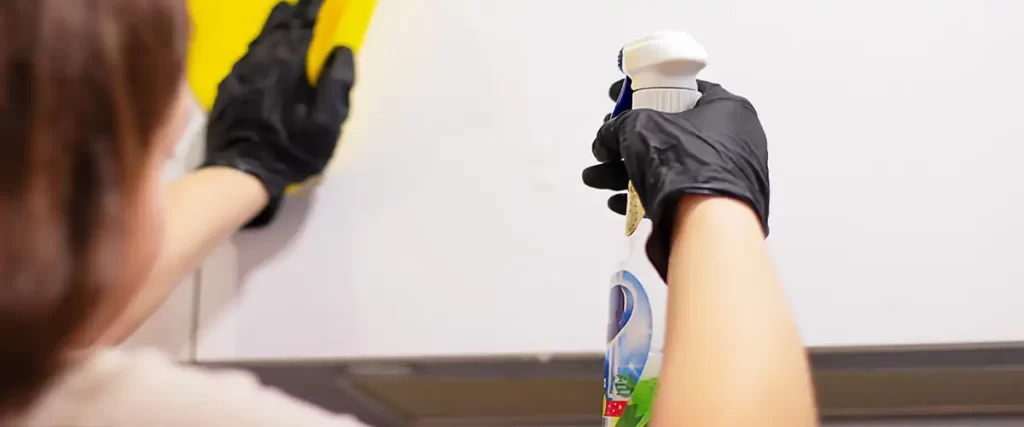
Do: Use Gentle Cleaning Products
Stick to a soft microfiber cloth with warm water and a small amount of mild dish soap. Wipe gently, then dry with a clean towel to avoid streaks or moisture buildup. For best results, you can use a tack cloth to remove fine dust from the surface before wiping with a damp cloth.
Don’t: Use Harsh Cleaners
Avoid bleach, ammonia, or abrasive sponges. These can wear down the finish and cause fading or peeling, especially around handles and high-touch areas.
Using gentle cleaning methods helps preserve the cabinet finish so it can withstand wear and tear over time.
How to Remove Grease Without Damaging Paint
Grease and fingerprints are common in kitchens, especially around drawer pulls and stove-adjacent cabinets.
For tough grease spots, a little elbow grease may be required, but always use gentle methods to avoid damaging the surface.
Do: Try a Vinegar Solution
Mix 1 part vinegar with 2 parts water for a safe, natural degreaser. Apply with a soft cloth and avoid soaking the surface.
Don’t: Scrub Aggressively
Scrubbing can scratch or dull the paint. For stubborn spots, make a paste with baking soda and water and gently wipe in a circular motion. Test any method in a hidden spot first.
Deep Cleaning Tips (Monthly or As Needed)
You don’t need to deep-clean your cabinets often, but doing it right every month or two will help preserve the finish.
- Dust with a dry microfiber cloth
- Use a mild degreaser when needed
- Wipe dry immediately to prevent moisture damage
- Avoid letting cleaning products sit on the surface for too long
- Use drop cloths to protect floors and nearby surfaces during deep cleaning
Be sure to remove all remaining dust after cleaning, as even small particles can settle on cabinet surfaces and affect the finish.
Tips for Protecting Painted Cabinets Over Time
Beyond cleaning, applying a top coat is a key step for achieving a high quality finish and ensuring long-term protection for your cabinets. These simple habits can extend the life of your finish and prevent premature wear:
Do:
- Use soft bumpers or pads inside doors to absorb impact
- Install heat shields if your cabinets are next to stoves or dishwashers
- Keep appliances like toasters or kettles a few inches away from cabinet surfaces
- Add a clear coat (polyurethane or polycrylic) for added durability in high-use areas
- Take extra care to protect cabinet fronts, doors and drawers, as these are the most visible and frequently used surfaces
Don’t:
- Overload shelves, especially upper ones. Too much weight strains hinges and can cause sagging or paint chipping.
- Apply too much paint during touch-ups. Excess paint can cause drips, runs, and an uneven finish. Use multiple thin coats instead.
- Leave wet cloths or steam near cabinets. Moisture is a paint finish’s worst enemy.
- Let sunlight bake the paint all day; consider using blinds or curtains to reduce fading in bright kitchens.
How Long to Wait After Painting Cabinets (Quick Reference)
| Action | Wait Time |
| Light use | 2–3 days |
| Doors/hardware back on | 2–3 days |
| Load items | 7–14 days |
| Deep clean | 21–30 days |
| Add sealant/topcoat | After full cure |
Note: Always follow the manufacturer’s instructions for your specific paint type and recommended drying times.
What to Do About Chips or Scratches
Even with careful use, minor damage can happen. Touch-ups are a normal part of long-term care.
For deeper chips or hardware holes left from changing handles or knobs, use wood filler to fill the area before sanding and repainting.
For small chips:
- Lightly sand the area with fine-grit paper
- Apply matching paint with a fine brush
- Let it dry fully before recoating
- Feather the edges for a seamless finish
For high-touch areas:
Consider applying a water-based polyurethane to protect against repeat wear. Especially around handles, drawers, or near sinks.
Creating a Painted Kitchen That Lasts
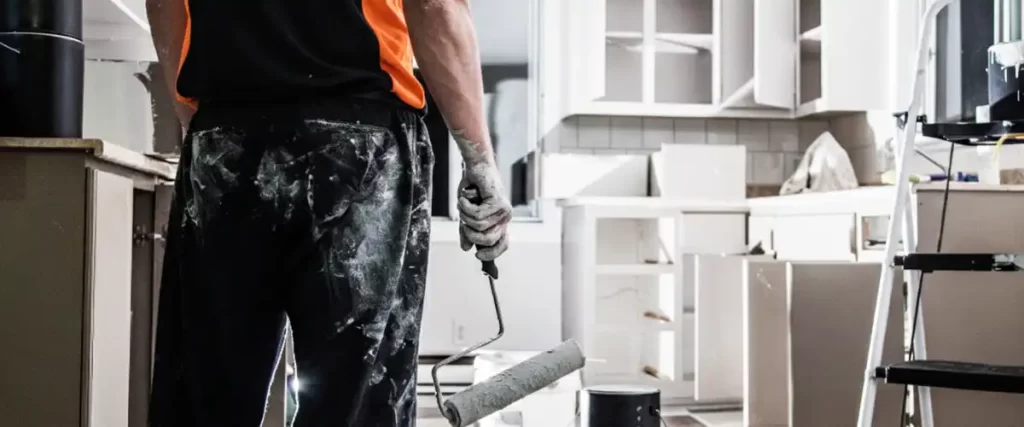
To ensure your painted kitchen stands the test of time, it’s important to use high quality products and follow proven painting techniques.
Start by properly preparing your cabinets. Cleaning and sanding the surfaces to remove grease, dust, and old paint.
Apply a primer to help the paint adhere and to create a uniform base for your chosen color. When it’s time to paint, use thin coats rather than one thick layer; this helps prevent drips and ensures a smoother, more durable finish.
Opt for a high quality paint specifically formulated for cabinets, as these products are designed to withstand the demands of a busy kitchen.
FAQs
How long after painting cabinets can I use them normally?
Wait at least 7 days for light use, but ideally 21–30 days for the new paint to fully cure before using them heavily or cleaning regularly. This ensures a durable, professional finish and helps the finished product last longer.
How long after painting cabinets can I hang them?
You can rehang doors after 48–72 hours, but avoid adding heavy hardware or slamming them until after the full cure (about 2–3 weeks) to prevent damaging the new paint.
How long to wait after painting cabinets before cleaning?
Wait until the paint has cured (usually 3–4 weeks). Early cleaning can damage the finish or leave streaks, especially if the wrong paint or insufficient coats of paint were used.
Do I need to seal painted cabinets?
Not always, but adding a clear coat helps protect the paint. Especially in busy kitchens. Using the right paint and a high-quality top coat helps achieve a professional finish and ensures the finished product is durable and resistant to scratches and moisture.
What’s the best way to maintain a freshly painted cabinet finish?
Gentle cleaning, avoiding moisture, using bumpers, and touching up chips promptly will keep your cabinets looking fresh longer. Using good paint and following the manufacturer’s instructions also makes a big difference in maintaining the professional finish.
Want Your Cabinet Painting to Last?
At Roll Call Painting in Wichita KS, we know cabinet painting is an investment, and we’re here to help you protect it. Our team offers expert maintenance and touch-up services to keep your cabinets looking freshly painted long after the project is done.
Regular upkeep not only helps your cabinets look better, it also extends the life of the paint by preventing chips, peeling, and wear in high-use areas.
If your cabinets could use a little attention, or you’re just not sure what they need, we’d be happy to take a look.
Call us at (316)-800-6994 or message us here to schedule a cabinet maintenance visit or ask about our touch-up services.